
Generac Generator Weekly Test Not Working (Why It Fails & How To Troubleshoot)
Every Generac home backup generator is programmed to run a diagnostic test. It can be weekly, bi-weekly or monthly to ensure the unit works. Thanks to their patented Quiet-Test technology that allows users to pre-set and run self-diagnostic tests on home backup generators.
But why does the Generac generator weekly test fail to run? What can you do to fix the issue?
The generator might fail to do weekly exercises for multiple reasons. These include, low battery voltage, contaminated fuel or fuel supply issues, clogged air filter, faulty spark plug, dirty fuel filter, faulty control board and sensor. These issues can be resolved by resetting the generator or troubleshooting the parameters one by one.
If you own a Generac generator, this guide will help you rectify the issues step by step. Here we’ve covered everything related to the Generac generator weekly test and how to troubleshoot the critical issues.
Let’s begin!
Contents
- 1 Why Do Generac Generators Fail Weekly Tests and Exercise?
- 2 Generac Generator Weekly Test Not Working: Troubleshooting Fixed
- 3 What To Do If Generac Generator Won’t Start After The Weekly Test?
- 3.1 Diagnosis 1: Check the fuel level
- 3.2 Diagnosis 2: Check the battery
- 3.3 Diagnosis 3: Check the oil level
- 3.3.1 Step 1: Disconnect the generator from the home’s main utility
- 3.3.2 Step 2: Shut down the unit’s power
- 3.3.3 Step 3: Let it cool down
- 3.3.4 Step 4: Remove the dipstick
- 3.3.5 Step 5: Read the dipstick
- 3.3.6 Step 6: Add oil
- 3.3.7 Step 7: Replace the oil cap
- 3.3.8 Step 8: Close the front door
- 3.3.9 Step 9: Restart the generator
- 3.3.10 Step 10: Reconnect to the grid
- 3.4 Diagnosis 4: Check the air filter
- 3.5 Diagnosis 5: Check the spark plug
- 3.6 Diagnosis 6: Drain the fuel tank
- 3.7 Diagnosis 7: Clean or replace the dirty fuel filter and carburettor
- 4 Conclusion
- 5 Frequently Asked Questions (FAQs):
Why Do Generac Generators Fail Weekly Tests and Exercise?
The generator might fail to do weekly exercises for the following reasons:
Low battery voltage:
One of the reasons why your unit isn’t conducting the pre-programmed weekly test might be because it has reached the battery maintenance interval. Consider opening the lid and reading the display screen from the control panel. If its a voltage issue, it will tell you to inspect the battery. Check the voltage, verify if the connections are tight, remove any corrosion from the terminals, and run the test manually. The battery voltage shouldn’t read less than 12.5 V and more than 13.5 V.
Issues with gas/fuel supply:
All home backup Generac generators run on natural gas or liquid propane (LP) fuel. If the fuel is contaminated or the fuel supply is restricted, the unit may not run the weekly test and not start.
That said, the generator will display error code 1100 if it’s low on gas. In that case, you must ensure that the gas is turned on. If the unit doesn’t perform the weekly test even though you’ve turned on the gas, you must contact an authorized service dealer.
Engine problems:
An overheated or overloaded engine can prevent the generator from running the weekly test. It can be due to problems related to engine components or the spark plug. We’ve given step-by-step instructions on troubleshooting these critical issues in the next segment.
Faulty control board:
The generator’s control board may be damaged, preventing it from running the weekly test. For example, 7.5 AMP is fused to the control module of the Propane 20KW Guardian series Generac generator, and you might notice the LCD screen will not display anything. In that case, the generator will not run the test automatically or manually, and you’ll need to install a new control module.
Faulty sensor:
Malfunctioning or faulty sensors can falsely trigger several conditions, such as high engine temperature or low oil pressure. This, in turn, can prevent the engine from running the weekly test.
Generac Generator Weekly Test Not Working: Troubleshooting Fixed
Your Generac generator might not run the weekly test cycle even after pre-programming it and running the test manually. In that case, consider resetting and restarting the generator.
Reset the generator:
Step 1: Open the lid.
Step 2: Turn off the electricity/shut down the power of the unit by switching the circuit breaker switch to OFF.
Step 3: Press the red OFF button on the control panel.
Step 4: Press the Enter key.
Step 5: Wait 30 seconds.
Step 6: Press the blue Manual button on the control panel once. This will let the generator start running the test for 5 minutes.
Step 7: Allow it to run the test, and if it doesn’t, put it into the OFF position by pressing the red button.
Step 8: Wait 30 seconds or more until the system cools down completely.
Step 9: Press the Auto button on the controller
Now you have reset the generator, and it will make three attempts to start. If it doesn’t start, consider following steps 2 – 9 one more time.
After resetting the generator, manually perform the weekly test cycle by pressing the Manual key from the control panel. If it doesn’t run the test, diagnose the following seven parameters as explained in the next segment and ensure each is functioning properly.
What To Do If Generac Generator Won’t Start After The Weekly Test?
If your Generac generator fails to start after a weekly test, there are seven diagnostics you can do to troubleshoot. I have explained them in detail below:
Diagnosis 1: Check the fuel level
You must ensure that there is enough fuel in the tank. You can check the fuel level of the Guardian/home standby generators by integrating Generac’s Tank Utility propane monitor with the Mobile Link app.
The utility monitor will notify you when to refuel the unit. Refuel the unit from the fuel port, which is located on the curbside of the unit, and start the generator again.
Diagnosis 2: Check the battery
The issue might be related to the battery, and in that case, you will see green and yellow LED lights turned on the side of the control board. The LCD screen of the control panel will also read “Inspect Battery.” If it does, then perform the following diagnostics:
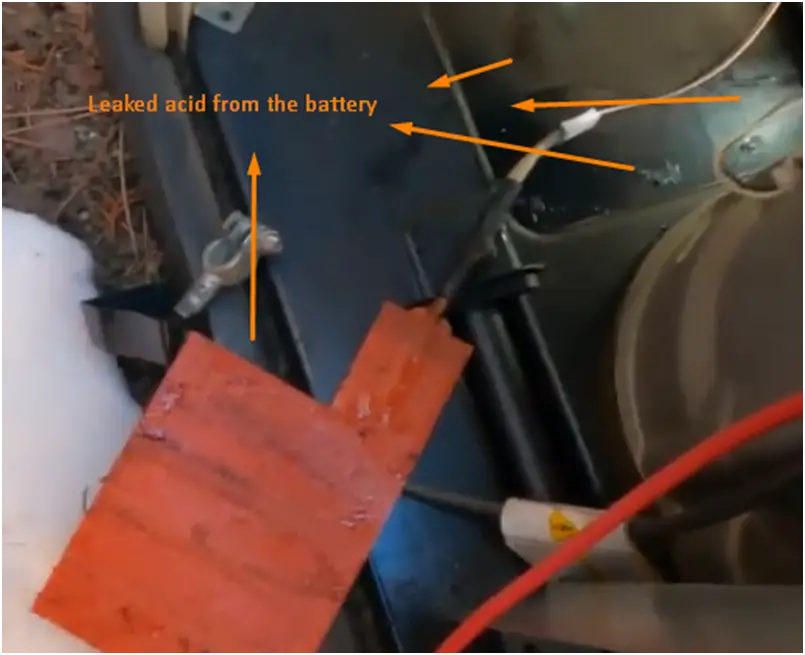
- Wear safety gloves, open the side cover, and find out if it’s leaking acid. Disclaimer: If your skin comes in contact with the battery acid, it can cause chemical burns. Clean the battery terminals and the compartment if it’s leaking acid with a rug.
- Ensure that the battery is well-hydrated by taking off the lid and measuring the water level with the help of a hydrometer.
- Also, check the battery voltage. It shouldn’t read less than 12.5 V and more than 13.5 V.
- Finally, look at the date code on the top of the battery cover. Consider changing the battery if it’s older than 3-4 years.
Diagnosis 3: Check the oil level
Add oil if the oil level is low, and replace it if it’s dirty. You can check the condition of the oil and its level by opening the lid and using the dipstick inside the unit.
Here is a step-by-step instruction on how to check, replace and add oil to the Generac generator (Guardian or standby series):
Step 1: Disconnect the generator from the home’s main utility
Turn off the main circuit breaker in your house by switching it from the ON position to the OFF position.
Step 2: Shut down the unit’s power
Locate the Main Circuit Breaker, which is outside or at the top of the control panel, and flip the switch from the ON position to the OFF position. Now place the generator from the Auto mode to the OFF position, and this you can do by pressing the red button from the control pane
Step 3: Let it cool down
Allow the unit to cool down for 5 – 10 minutes.
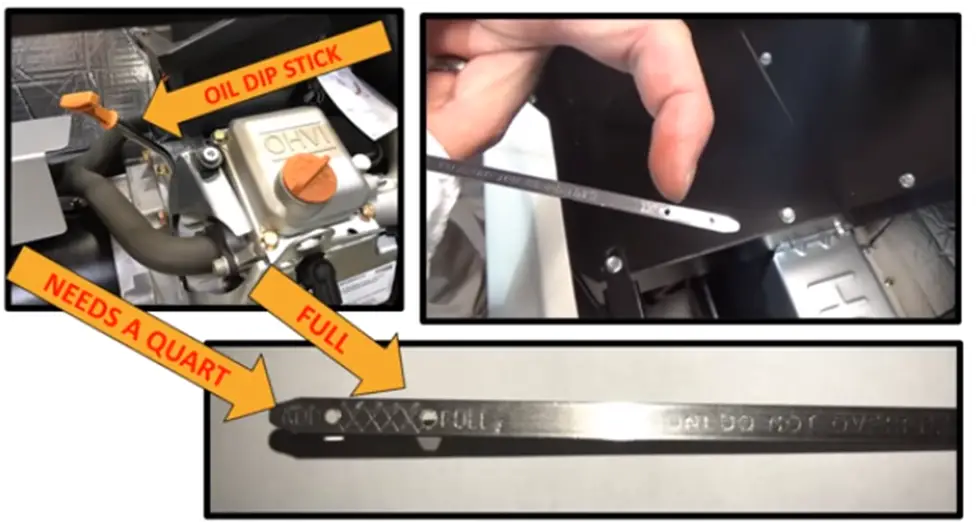
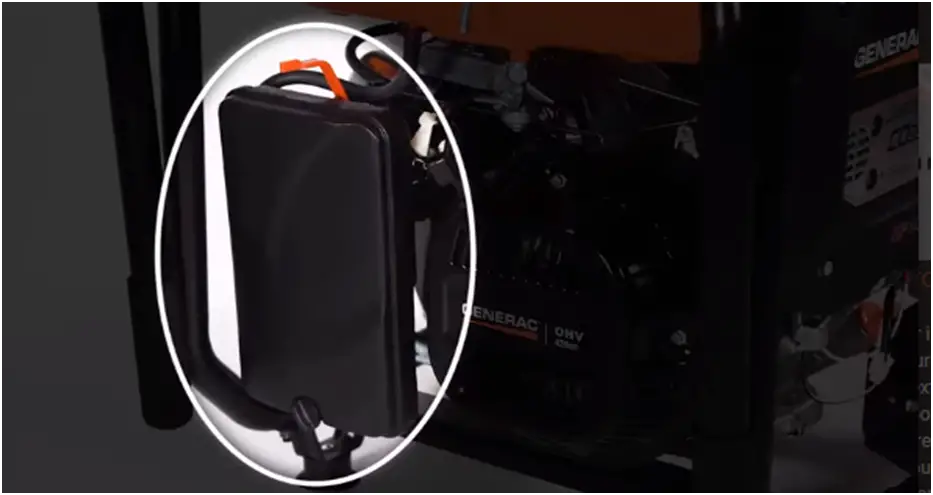
Step 4: Remove the dipstick
Gently pull out the orange head of the dipstick from the left side of the engine and wipe it with a clean rag.
Step 5: Read the dipstick
Put the dipstick back in and pull it out to read the level and identify the condition. The oil level should be between the “ADD” and “FULL” marks. Add oil if the level goes down to the “add oil” mark.
Step 6: Add oil
- First, you have to remove the front door. Lift up, tilt back, and pull over the front door out of the way to remove it.
- Twist the orange cap of the oil fill and remove.
- Add a Generac branded oil or a synthetic 5W30 oil inside the tube.
- Recheck with the dipstick to ensure that the oil reaches the “FULL” mark and doesn’t over-exceed.
Step 7: Replace the oil cap
Take the orange cap and put it back on by rotating it.
Step 8: Close the front door
Close the door by sliding the two pins on the bottom into the two holes at the unit’s base. Lean forward, tilt up, and push down the door.
Step 9: Restart the generator
Press the green key from the control panel to place the generator into the auto position, and generator will start and run in about ten seconds. Allow the generator to come up to speed by waiting a few minutes, and then place the mainline circuit breaker from the off position back to the on position. Doing so will restore the power and restart the unit.
Step 10: Reconnect to the grid
Pull down the lid to close it and turn the latches on both sides of the unit to lock the door. Turn your home’s main circuit breaker back to ON by flipping it from the OFF position to the ON position.
Diagnosis 4: Check the air filter
This is the least probable reason, but a clogged air filter can also prevent a Generac generator from starting. If you suspect the air filter is clogged, then you should check it. You can check the air filter’s condition by opening the unit’s lid and as shown in the following image.
After removing or replacing the air filter, you will notice a code on the control panel’s display screen, and you’ll need to hit the OFF button once and then the Enter key. Doing so will clear the code, and then press the Auto button.
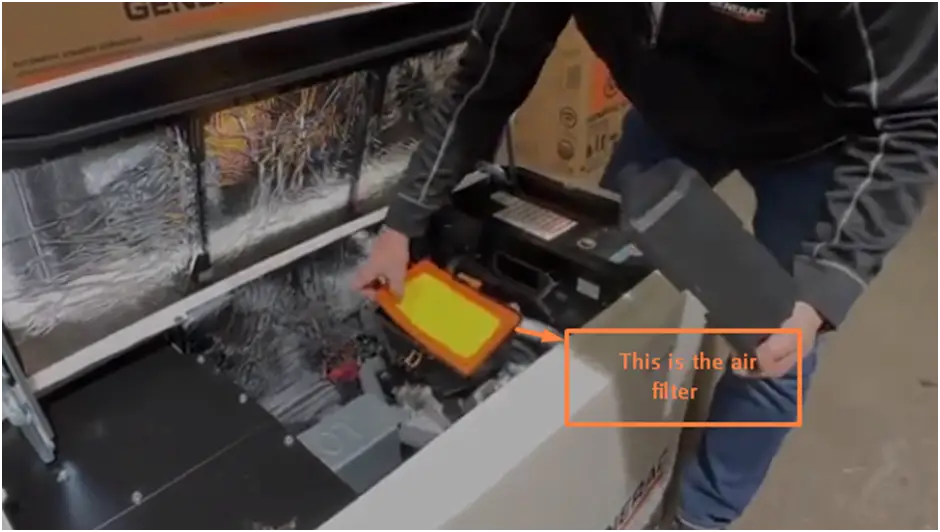
The above image shows the air filter of the Guardian series and standby Generac generators. If you have a portable Generac generator, the air filter is located outside the unit.
In the case of a portable Generac generator, unscrew the air filter cover, remove the air filter by opening the cover, and clean the filter with soapy water.
Diagnosis 5: Check the spark plug
A faulty spark plug is another reason why the generator might fail to start after a weekly test. Most OEM technicians recommend changing the spark plug at least once a year. You can test the spark by using a spark tester. If the spark tester flashes red when the generator is running, it would indicate that there is no issue with the spark.
You can also understand whether it is necessary to replace the spark plug by checking the condition of the electrode. You don’t need to replace it if the electrode of the spark plug doesn’t look worn out. If you see surface rust on the electrode or if it looks worn out, you should change it.
Here is how to inspect the electrode and replace the spark plug:
Step 1: Follow steps 1 to 4 from the segment on checking the oil level.
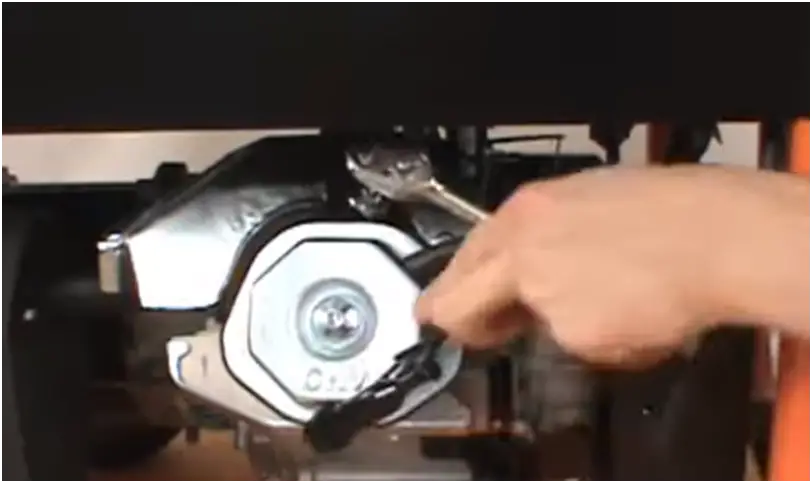
Step 2: Remove the spark plug’s boot by gently pulling it.

Step 3: Remove the spark plug by using a socket wrench.
Step 4: Read the spark plug’s part number.
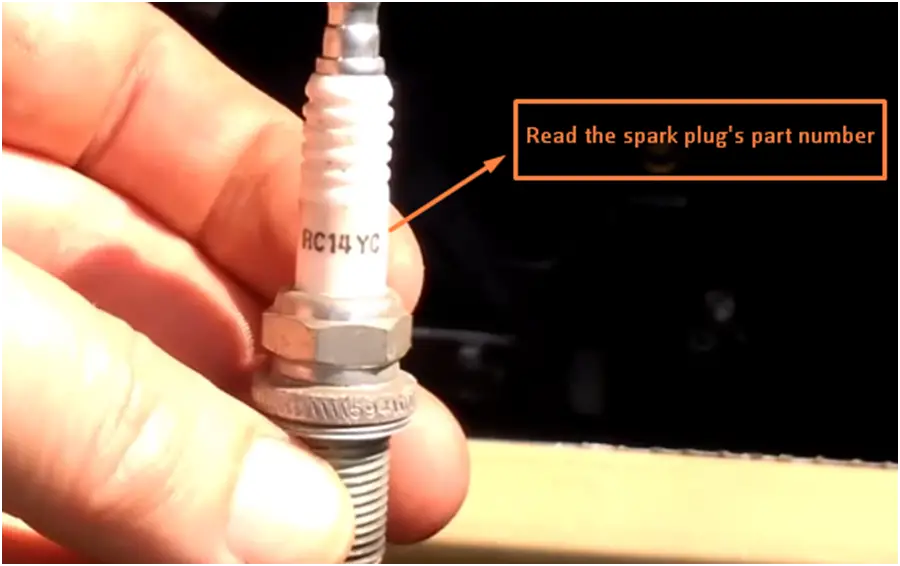
Step 5: Inspect the electrode.

If the electrode seems worn out and rusty, you either need to clean it or replace it with a new one.
Step 6: Take a new spark plug and thread it back into the spark plug housing.
Step 7: Tighten the spark plug by using the socket wrench.
Step 8: Reconnect the spark plug boot.
Step 9: Restart the generator with the same procedures as explained in step number 9 to 11 from the segment on checking the oil level.
Diagnosis 6: Drain the fuel tank
If the fuel has been sitting idle inside the generator for over a year, then you must drain it.
Here is how to drain the fuel tank:
- Shut down the generator by following the steps mentioned in the above segments.
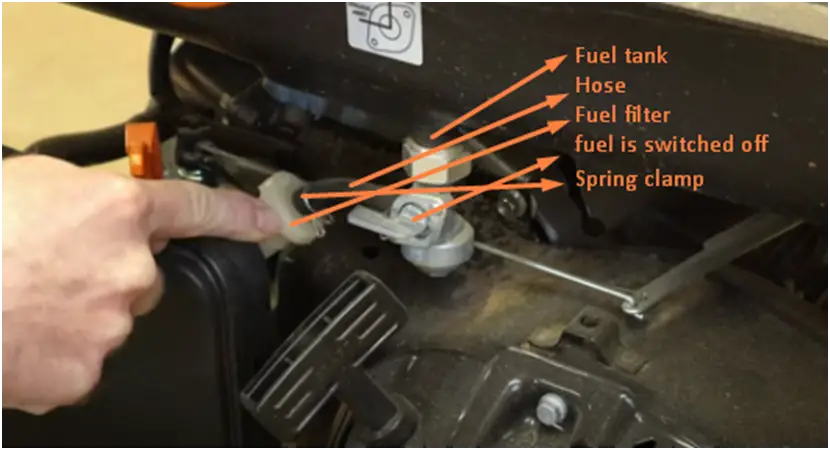
- Next, locate the fuel tank, as shown in the image.
- Make sure the fuel is turned off.
- Loosen up the spring clamp by gently putting pressure on it with your hand or with pliers.
- With the help of pliers, twist the hose and wiggle it to remove the fuel filter.
- Attach an old hose and turn the fuel ON, and this should start draining the old gas.
Diagnosis 7: Clean or replace the dirty fuel filter and carburettor
After draining old gas, it is important to either replace the fuel filter as well as the carburettor with a new one every year or give them a thorough clean by following the above steps:
- Remove the air filter and the carburettor and soak them in a commercial solvent overnight.
- Clean off the solvent from the units by using a spray carb cleaner. Make sure to wear safety gloves and goggles when using spray carburettor cleaner.
- Get the cleaner into every passage and hole of the filter and the carburettor.
- Use low-pressure compressed air in order to dry the units.
- Reassemble them.
Conclusion
Finally, you must agree that it’s pretty easy to program your Generac generator for weekly tests. But one of the most popular complaints is that sometimes the generator might fail to restart after the test. If that’s the case, we have already discussed all the ways to troubleshoot it. If that doesn’t work, it is high time to contact the dealer or take support from a Generac-certified technician.
Frequently Asked Questions (FAQs):
What is the quiet test mode on the Generac generator?
All home backup (Protector and Guardian series) Generac generators come with the “Quiet Test” feature. It is a self-diagnostic test run by the generator itself. The purpose of this mode is to keep the unit quieter and consume less fuel when running the test cycles.
How do you know if your Generac generator is working?
You can tell the generator isn’t working if it fails to run the pre-programmed self-diagnostic test automatically and manually.
Why is my Generac Generator not performing its weekly test?
Several factors could cause the weekly test on your Generac Generator to fail. Common reasons include a faulty controller, low battery voltage, inadequate fuel supply, malfunctioning sensors, or programming errors. It’s essential to troubleshoot each potential issue systematically to identify and resolve the root cause.
What steps can I take to troubleshoot and fix my Generac Generator’s weekly test failure?
Begin by checking the generator’s controller display for error codes or warning messages. Ensure that the generator is receiving adequate fuel and that the fuel supply lines are clear of obstructions. Test the battery voltage to confirm it’s within the recommended range. Inspect sensors, connections, and wiring for any signs of damage or corrosion. If you’re unsure how to proceed, consult the generator’s manual or contact a qualified technician for assistance in diagnosing and repairing the issue.
